Just like we did it in 1939
Bolted in crossmembers
3/8" bolts
Might need additional bottom spacer leaf
Never thought he'd be working on cars again. And enjoying it.
I remind him of himself at Womble's Garage back in 1939 for $0.10 an hour
Like a professional did it
Encouraging
Tuesday, June 27, 2023
Friday, December 5, 2014
See My Latest Progress on Instagram
While it would appear from the lack of posts that I've been idle on the project, I've actually continue to work steadily on the roadster. Unfortunately, I'm now building more than I'm blogging (the opposite was once the norm), resulting in a nearly (I hope) insurmountable backlog of draft posts.
So, rather than ending up here and being disappointed at not getting the "rest of the story", check out my Instagram feed (linked at the right) to see my latest progress.
-30-
Thursday, July 18, 2013
In-Between Posts
This is work I did between the shop nights of 2/14/13 and 2/21/13:
Because my notes are sketchy, I'll summarize by saying it looks like I spent the week talking to people whose advice I respect about the condition of this lightened flywheel and seeing if they had a lead on a 9" flywheel.
I ended up getting a used (good core, or possibly make-do condition) 9" pressure plate from my uncle, and my friend B thought he found the correct 9-1/2" pressure plate (1949-50 Lincoln? Truck?) to fit the pre-'49 throwout bearing snout. I found a flywheel at SF Flatheads/So-Cal Speed Shop Sacramento that is drilled for 9", 10", and 11" and looks just like my 9-1/2", so it might be a viable option.
Lastly, I made an unsuccessful visit to a local industrial hardware supplier to see if they had any clevises I could use for the brake pedal arm to master cylinder linkage. Alas, they did not (in fact, the first counter jockey didn't even know what a clevis is!) but the second parts man correctly recognized the part I had in my hand (the threaded rod with an eye at the end) as a brake/M/C rod (although he guessed VW or early Porsche. I got to talking with him and discovered that he builds sprint cars, drag motors, and does car builds/restorations. I made sure to get his name and number for possible future fabrication work with my original go-to guy is gone (retired, as I've heard).
Also, during this week (although it might've been later as I'm writing all of these several months after I took my working notes) I got from my uncle several brake rods (mechanical) and clevises to use for the brake and clutch linkages.
-30-
Because my notes are sketchy, I'll summarize by saying it looks like I spent the week talking to people whose advice I respect about the condition of this lightened flywheel and seeing if they had a lead on a 9" flywheel.
I ended up getting a used (good core, or possibly make-do condition) 9" pressure plate from my uncle, and my friend B thought he found the correct 9-1/2" pressure plate (1949-50 Lincoln? Truck?) to fit the pre-'49 throwout bearing snout. I found a flywheel at SF Flatheads/So-Cal Speed Shop Sacramento that is drilled for 9", 10", and 11" and looks just like my 9-1/2", so it might be a viable option.
Lastly, I made an unsuccessful visit to a local industrial hardware supplier to see if they had any clevises I could use for the brake pedal arm to master cylinder linkage. Alas, they did not (in fact, the first counter jockey didn't even know what a clevis is!) but the second parts man correctly recognized the part I had in my hand (the threaded rod with an eye at the end) as a brake/M/C rod (although he guessed VW or early Porsche. I got to talking with him and discovered that he builds sprint cars, drag motors, and does car builds/restorations. I made sure to get his name and number for possible future fabrication work with my original go-to guy is gone (retired, as I've heard).
Also, during this week (although it might've been later as I'm writing all of these several months after I took my working notes) I got from my uncle several brake rods (mechanical) and clevises to use for the brake and clutch linkages.
-30-
Valentine's Date?
I wasn't very consistent when I was drafting these posts. I might've done this work on 2/14/13 and drafted this on 2/21/13 or I might've done the work on 2/21/13. I know we worked Valentine's Day as my wife and I postponed our date to avoid the crowds and expense of the holiday. Nonetheless, my notes are sketchy enough that it's a brief post.
It appears that this night we drilled out to 3/8" the mounting holes (I originally had 5/16") for the master cylinder (a '39 Ford-type) on the Tardel mounting bracket that I had made from the drawings in his (and Mike Bishop's) book. Despite my wanting to purchase all original style Ford bolts from this supplier, W insists in the interest of cost and ease of assembly (coarse thread (UNC) being faster to start and tighten than SAE (fine thread)) that we just use hardware from the local hardware and big box stores. And seeing how he has become our parts runner (going out and buying hardware for which I reimburse him), how can I argue with him? The cost is a good factor, but I sure appreciate not futzing around with "just the right bolt" when we can have it assembled that night.
We also took a look at the 9" flywheel on my other flathead to discover, in W's words: "some damned hotrodder's lightened this thing!"
It appears that this night we drilled out to 3/8" the mounting holes (I originally had 5/16") for the master cylinder (a '39 Ford-type) on the Tardel mounting bracket that I had made from the drawings in his (and Mike Bishop's) book. Despite my wanting to purchase all original style Ford bolts from this supplier, W insists in the interest of cost and ease of assembly (coarse thread (UNC) being faster to start and tighten than SAE (fine thread)) that we just use hardware from the local hardware and big box stores. And seeing how he has become our parts runner (going out and buying hardware for which I reimburse him), how can I argue with him? The cost is a good factor, but I sure appreciate not futzing around with "just the right bolt" when we can have it assembled that night.
We also took a look at the 9" flywheel on my other flathead to discover, in W's words: "some damned hotrodder's lightened this thing!"
Not sure it will work, but I'm still coming up dry looking for a 9" flywheel elsewhere.
-30-
Sunday, July 14, 2013
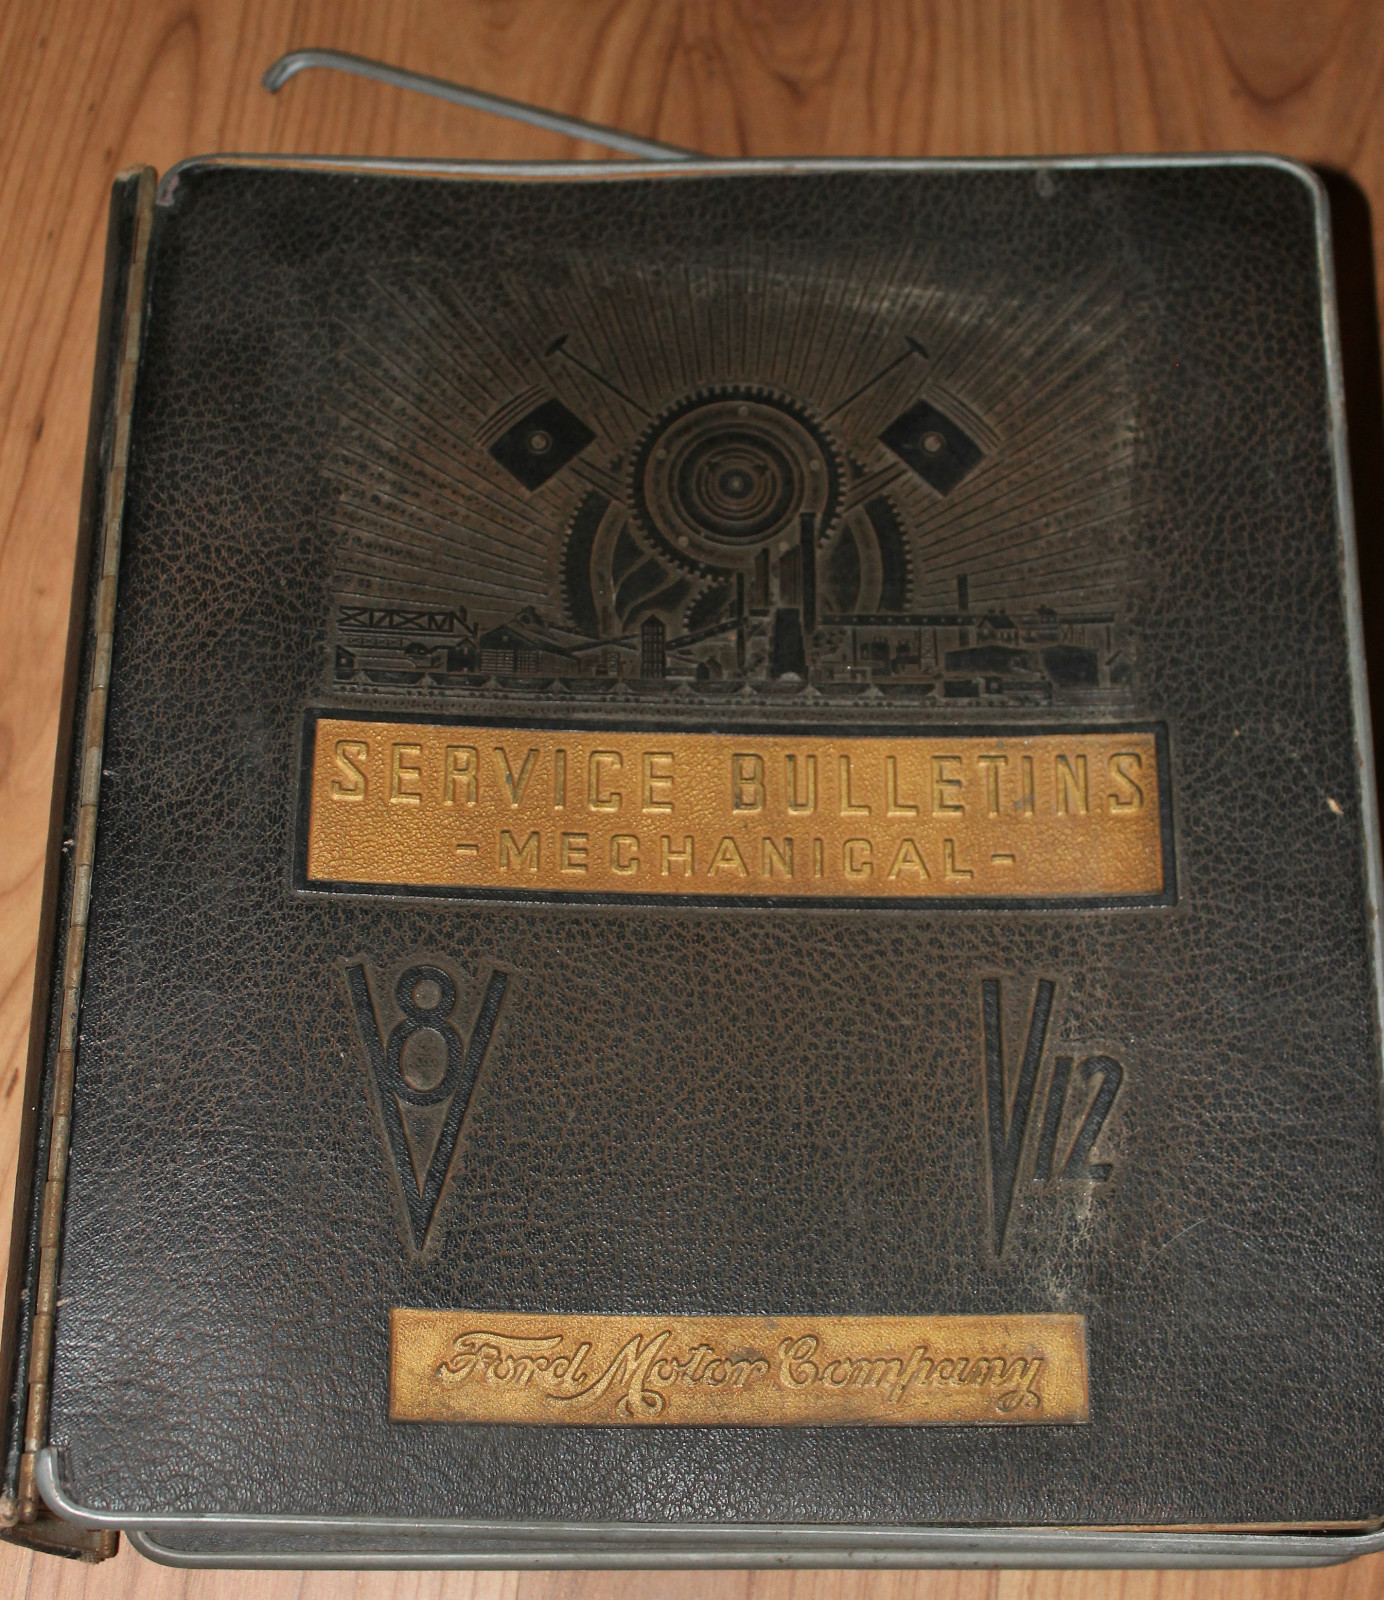
Early Ford V-8 Service Bulletins
This was meant to be essentially a notes post for myself, to record the tags/labels/whatever Blogger wants to call them now, that I'll begin tagging and, eventually, go back and retag my old posts for easier topical searches.
I have recorded below the categories or binder tabs found in early Ford V-8 Service Bulletins (also used in the Model A era, maybe Model T, too - I'm not sure. In searching for a link for the previous sentence, I was surprised how little I found on this topic outside of eBay listings. If you ever get a chance to see/borrow/scan/buy an original set of these service bulletins, do not pass up the chance! The repros are great, and I have a couple of sets, but the originals are priceless because of their size, clarity, and the tactile feedback you get from the (cotton-based?) paper and history they ooze.
Anyway, the bulletins were issued to Ford mechanics to update/illustrate/educate them on running changes to Ford parts and services, including some of the new, gee-whiz things like hydraulic brakes and overdrive (Lincolns) and are invaluable nowadays to understand the how and why of Ford parts when most of the original old-timers are gone.
Binder Tabs:
Service Management
|
0 – 999
|
Wheels & Tires
|
1000
|
Brakes
|
2000
|
Front Axle & Steering
|
3000 / 3500
|
Rear Axle & Torque Tube
|
4000
|
Frame, Exhaust & Springs
|
5000 / 5300
|
Engine
|
6000
|
Transmission & Clutch
|
7000 / 7500
|
Cooling System
|
8000
|
Fuel System
|
9000
|
Electrical/Ignition System
|
10000 – 15999
|
Fenders - Shields
|
16000 – 16999
|
Accessories
|
17000 – 19999
|
Body & Paint
|
70000
|
Interior & Top
|
A-1
|
Control Systems
|
C-1
|
Specifications
|
S-1
|
Inspirations/Aspirations
|
X-1
|
-30-
Wednesday, June 19, 2013
2/14/13: Valentine's Day Motor Work

Tonight we pulled the oil pan and flywheel.
To do this work, however, we first had to mount it on my engine stand. This was not as easy as the first time I did it, however, because I was ignorant to one or two very important facts. The first is that the front exhaust port bolt holes are not 3/8" like the middle and rear holes; the fronts are 7/16". I didn't know this last time and somehow was lucky enough to shove some 3/8" bolts in there and not have them tear out of their threads and drop the motor on my feet.
My friend W (the old timer) said that this dimension difference dates back to the first V-8's and Ford carried it through (at least through '48; I'm not sure about '49-'53 blocks).
So, we had to run taps into all the bolt holes to clean them up and then drill out the Vern Tardel engine stand mount to accommodate the larger front bolts (that we had to scrounge from my assorted coffee cans filled with hardware).

Once we mounted the engine securely to the stand with a mixture of too long and just-right bolts and nuts, we pulled the oil pan and removed the flywheel and W examined the engine and the pan mounting job I did. He is convinced that if the pan and its seals (front, back, side rails) are not installed just right, you're asking for leaks.
He thought the cork seal in the back was OK, but the pan flange could be centered better, so he pounded it straight.
In taking a quick look at the motor, (and I subsequently stuck a set of dividers down one of the bores), W thought that the previous rebuilder (this motor was rebuilt at some time) probably pulled the sleeves and rebored it .045 (my understanding) to get it to 239". Therefore, it's probably an 81A, originally 221 cu. in., not a 99A or 99T Mercury or truck block.
As the apprentice mechanic on this job, I got the unenviable task of cleaning out the residue sludge (that had dripped out of the block since I last ran and drained it) out of the pan and filing and straightening the pan rails to ensure a good seal when we put it back on.
Next thing to do for me is search for a usable 9" flywheel and pressure plate.
-30-
Interstitial
OK, I finally have a chance to start publishing some of the backlog of blog posts on the project progress. Also, since it's been some time since I've regularly posted, I've picked up some ideas for tagging and references to people and information in my posts that will vary from previous posts. I hope to eventually go back and retag the previous posts for easy indexing and reference in the future.
For now, you'll just start to see the old posts pop up, with the date of the work done in the title.
-30-
Sunday, June 9, 2013
Working, Not Writing
OK (or, as my boy would say, o-hay!), whereas before my problem was writing but not working on the car, now my problem (a good problem to have) is working on the car, but not writing - well, not publishing.
Since my February 13 post, I began working every Thursday and, eventually, every Tuesday and Thursday on the hot rod. Or, as my friend recently corrected me, "roadster," as it sounds much more classy than "hot rod." Each night, following the work session, I've diligently jotted down in Blogger my notes from the evening and attached the photos. Now I need to take some time to expand upon (or expound) on those notes and publish the posts.
So, this is a brief update as I hear son #2 crying now, but I hope to return here soon to publish the delinquent posts.
-30-
Thursday, March 28, 2013
3/28/13 Spring Fling (No Pics)
Undid new spring
Removed top two leaves, top beveled, and bolt
Unbolted old spring
Hoisted frame
Undid old spring
Cleaned, assembled
Bolt too tall
Disassembled, filed down
Reassembled, tightened correctly
Started looking at brake lines
Removed top two leaves, top beveled, and bolt
Unbolted old spring
Hoisted frame
Undid old spring
Cleaned, assembled
Bolt too tall
Disassembled, filed down
Reassembled, tightened correctly
Started looking at brake lines
Saturday, March 16, 2013
3/16/13
Severely lightened flywheel
Cut off ring gear
Don't use; good money after bad (may fail)
Set up clutch pedal
Mostly set up brake pedal
Next: 3/8" bolts in K-member (in Tardel's instructions; book?)
Build vice stand!
Cut off ring gear
Don't use; good money after bad (may fail)
Set up clutch pedal
Mostly set up brake pedal
Next: 3/8" bolts in K-member (in Tardel's instructions; book?)
Build vice stand!
Saturday, March 9, 2013
3/9/13
Saturday for a Change
Drilled out to 3/8" (bit by bit, 1/64" at a time) the following holes:
M/C mount
Pedal Box
All shared holes
Got clevises from Itch
Joblot hardware, if I haven't already mentioned it
Still no flywheel
Drilled out to 3/8" (bit by bit, 1/64" at a time) the following holes:
M/C mount
Pedal Box
All shared holes
Got clevises from Itch
Joblot hardware, if I haven't already mentioned it
Still no flywheel
Thursday, February 21, 2013
2/21/13: Pedaling Along

Tonight we (perhaps) finished drilling all of the 3/8" bolt holes to mount the master cylinder bracket to the frame, and the master cylinder to the bracket. The bracket I have (that I built from plans in the Bishop/Tardel book) is designed to mount using (presumably) factory '32 pedal assembly and K-member holes. Well, I'm using a '33-'34 pedal assembly and a Tardel K-member for the Model A frame, so we had to drill all but one of our mounting holes (by step drilling from 1/8" or so) and opened up to 3/8" the holes for the master cylinder (for strength). This was tedious (a 64th or so at a time) and resulted in several broken bits (from my ancient set of no-name bits). Several times, to keep us going, W repointed dull or not-so-badly broken bits on the bench grinder.
After doing that, we took a look at the swing for the clutch pedal and determined it will hit the firewall before full travel. So, we marked the trouble spot (ended up being not just a notched-out section, but a short strip down the firewall) and cut horizontally at the top with the hack saw (just an aside, the hack saw is becoming one of our favorite go-to tools - it's fast, and quiet, which is great at 10 o'clock at night). We then used vice grips and a small block of metal to clamp at the vertical cut line and just bent back and forth until we broke the section free.

Pedal interference with the firewall
Marked for removal
Cut and bent out (first section)
Removed the whole section to avoid problems
Finally, to hook up the clutch pedal to the transmission release arm (one that we selected because it seemed to provide the best alignment and most travel against the transmission case; I don't know what year it's from), W and I both were thinking along the same lines in our separate, late night reveries: we both independently went out and bought some small turnbuckles and threaded rod and some OK clevises - although too small, it turns out. The turnbuckles were a bust - they are too small or too big and have too much slop in them. The threaded rod would work if we had clevises the right size: 5/16" or 3/8".
Clutch adjustment rod mock-up (with master cylinder rod)
In looking at my Ford parts catalogs, it turns out there was a 5/16" clevis used on Model As that seems just right. I don't recall immediately what the application or part no. is, but I think it was for brakes. [Note: found it; yes, mechanical brake clevis up to 1938 - 97012-S] Later clutch adjustment clevises are 3/8", which seems too large.
Lastly, this week (and, as I write this post hoc, subsequently) W gave me some cool old (and random) hardware from his garage, some in ancient tin cans like Hollywood Shave Cream and Yan Chim Kee Cocoanut Flavored Candies. Problem is, I don't have a good hardware storage system as it is, so additional stock, while appreciated, is just more stuff that I need to find a home for.
-30-
Labels:
Body & Paint,
Brakes,
Control Systems,
Transmission & Clutch
Wednesday, February 13, 2013
Turnabout and Out
Well, last week I was able to dig in and clean up the garage so I could spin the car 180* on the Harbor Freight wheel dollies it's sitting on. Was able to do I myself but sure had a sore back for a few days thereafter. Got it positioned under the beam and relocated the chain fall to give us some room to work around the front end.
I used my reproduction K.R. Wilson engine pulling fixture (you can read more about K.R. Wilson tools in my previous post here) that I got from Specialty Ford Parts in Rosemead, CA (no website; not sure if they still carry it). It can be positioned two ways, depending upon if you're pulling just the motor, or the motor and trans. We just pulled the motor and left the trans bolted in the frame with a jack under it to keep it supported (note to self: replace jack with adjustable jack stand, to save the hydraulic jack seals!). (As a disappointing aside, I asked my friend to identify the other K.R. Wilson engine stand parts I show in that other post, but he didn't recognize them and chalked it up to them being military. I don't think that's so, but have yet to find other information on them. I'll have to keep looking.)
We unbolted the pressure plate to find to my disgust that the clutch disk had lightly rusted to the flywheel and the pressure plate. My old-timer friend found to his disgust that apparently I had not run a tap down into the pressure plate mounting holes in the flywheel and they had rust in them, so he ran the tap into them using the taper tap I had. It should've been a bottoming tap (straight sided), but I didn't have one.
He also said that his old boss (at the Ford dealership) would've slapped me across the face for leaving gunk in the pan below the clutch. I think I thoroughly cleaned the oil pan but didn't realize that the hardened gunk can heat up and end up on the clutch disk, causing slippage.
We concluded the night with him providing me directions to compare the 9-1/2" pressure plate with a 9" to see if I'm lucky enough to find they use the same mounting bolt pattern. Since that night, I've already returned the pressure plate to the friend I got it from and have gotten some leads on new and used pressure plates, and some dimensions to check my flywheel this week.
I appreciate my old-timer friend's advice to begin in the center, deepest section of the car as it's the most difficult to get to if something goes wrong. Based upon his advice, I think we'll continue in the middle and work our way out. With that in mind, this week I hope to continue working on the clutch and brake pedal assembly, looking at parts I'll need to purchase to complete the clutch linkage and checking out the various options I have for mounting the master cylinder, as well as checking out the used master cylinders sitting on my parts shelf.
If we continue diligently on the chassis, I think I would benefit from (once the motor's back in the chassis) relocating the car in the garage so I can pull off the body and set it on some former camper shell stands I have. That way we'll have full and unobstructed access to the chassis to begin plumbing it and finishing up welds and body mounts I'd kind of forgotten about over the years of inactivity.
-30-
Saturday, February 9, 2013
Back from Hiatus
So, last week I did more work on my hot rod in three hours than I have in the last three years.
I have an old-timer friend who lives down the street whom I knew before moving to this neighborhood. He and began working on Fords in 1939 at the tender age of 13 for $0.25 an hour. After the war, he eventually went on to graduate from the Ford dealership shop to the sales floor and went out as a sales manager. After some time away, he returned to working on his and other folks’ early Fords (flathead V-8s and earlier) and other old cars.
I met him years ago through the local Early Ford V-8 Club when he helped me disassemble a banjo ring and pinion. But, when I moved into the neighborhood, he wasn’t working on cars at all. Fast forward to now, when he has returned to working on them and wants to help me with my car.
So, we recently began scheduling weekly car nights (he’s helping me to actually honor car nights that have been in my calendar for years, but sporadically observed) starting with my learning how to use the K.R. Wilson Timing Fixture he recently gave me. While that session was a bust because the diving bell distributor I brought had a broken base, we decided to meet regularly and the most recent session was last night in my garage, taking a look at the clutch.
For whatever reason, most likely his insistence that a smoothly operating clutch is a must, my friend has for some time been concerned about whether or not my clutch was set up correctly. For the record, I have a 9-1/2” clutch and pressure plate that apparently came standard in 1949-53 Ford and 1951-53 Mercury cars.
Even before last week's discovery (I’m getting ahead of myself here), this set-up has been a problem: the thickness of the flywheel and/or ring gear caused me to have to trim down the thickness of the starter end plate to enable the Bendix drive to disengage upon starting (I have yet to reassemble the starter after that problem for several reasons).
So, last week we started out by trying to test how smoothly the clutch would release by installing a clutch release arm to the shaft and testing it with a piece of pipe or pipe wrench, since I don’t have my brake and clutch pedals connected yet. First, we began by filing and fitting the three different clutch release arms I have in my stash to see which would line up best with the pedal arm and not be prevented from releasing by interference with the transmission bellhousing. We settled on this one:
However, once we installed it with a drift punch through the pin hole and used a pipe wrench on the drift to release the clutch did we discover we couldn’t get the arm to move beyond pushing the throwout bearing forward to the pressure plate fingers. It turns out they are jammed in place, and can’t move forward. In fact, it appears that the clutch is already partly released by virtue of where the arms are jammed.
Sorry, no picture (yet)
It appears that the pressure plate fingers have too small of an open diameter between them because the 1949-later input shafts are much smaller than the 1948-earlier transmissions, so my larger input shaft is jamming forward the fingers of the pressure plate.
To further diagnose the problem, I’m going to have to spin the car 180* in the garage (which requires cleaning up the garage floor first) and pulling the motor to get to the transmission and pressure plate. The likely solution: change out the 9-1/2” pressure plate and clutch for the even lighter 9” pressure plate and clutch (that came in 1935-40 Fords) my friend’s been recommending all along. This, in turn, would require redrilling the flywheel or getting another flywheel. Sigh.
If it was easy, everyone would build a hot rod.
I’m hoping to get the garage, car, and motor ready to pull out my next Thursday garage night. We’ll see...
-30-
Thursday, September 15, 2011
Then and Now
Nearly a year ago...was it really that long ago? Yeah; hard to believe. Since then, let's see: finally got moved in, settled, and cut ties with the old place and...became a dad (to a boy - can you tell from the lead pic?). It's all they say it would be - great, amazing, tiring, and more - and, yes, it takes time away from the hobby. But if you're lucky, you get a sense of perspective, too. Doesn't mean you abandon your hobby. Just means it doesn't happen at the pace it used to. And I'm OK with that. Still plugging away. Maybe just not posting as often (for sure not as often, actually!).
So...after we finished the garage work, I had to deal with a break-in theft at the old garage. Lost a few things, but nothing insurance couldn't replace. But, it sure put a dent in my whole move-in plan, as designed in SketchUp. So, spent one frantic Friday night and Saturday morning quickly dragging everything to the new place and packed it in, all around the hot rod. Oh, yeah. Got the hot rod over to the new place on its on wheels (but not under its own power).
So now, a year later, I finally sorted out the garage and its nearly put together, just about as I planned. Spent the week I would've been at Bonneville working on the garage. Was going to check an item off the bucket list, but my buddy's vacation got canceled, so we took a rain check for next year.
Next items for the garage include: finish electrical (will list details in a future post); hang requisite art; build vice stand; and new side window (when the rest of the house gets new windows).
That's all for now, but more to come later!
-30-
Monday, September 20, 2010
We Did It
Well, the absence of posts does not necessarily reflect the absence of work.
Yes, if you were wondering, we did raise that beam and we did install that plywood. Here's proof:
First, the supplies
Next, some work, fueled by the appropriate beverages
Afterward, a look from below
And a view from above (pre-plywood)
And another (post-plywood)
And, what, you may be asking, did I do with all that space? Well, fill it with a roadster pickup, of course!
The pickup, in pieces
And, pieces of the pickup (these actually went in cabinets)
And then, after some acrobatics and questionable moves, voila!
The pickup bed (and various and sundry pieces)
The '32 frame (crazily, my wife and I shoved this up here from the garage floor). Yeah, it was scary.
Not seen here, but in the other corner, to the left of the frame, is the cowl and other assorted parts.
I can't believe the whole thing fit up there, but it did. And, to prove I'm not the only crazy one out there with a car in the rafters (I know there's dozens of us), here's a photo of another guy my friend and I met at a car museum, who invited us to see his shop and works in progress. I told him I had to take this photograph to let my wife know doing something like this isn't out of the ordinary. This is a T, while mine is an A.
Well, that's enough for this post. Next will be Twice Lucky's first time on the road.
-30-
Tuesday, March 23, 2010
Plans Afoot
Well, long time no post. Really. It's been a really long time.


But, not without progress. Moved into the new house; emptied the old one. Some good downsizing, bartering and trading in the middle. Just the garage left to move.
But...before moving it, I've got to beef up the new one. Hence, the plans seen here, thanks to my talented new bro-in-law, who exceeded my expectations for some engineering drawings of the garage loft plans.
The plan is to add a 20' 5-1/8 x 12 Glu-Lam beam in the center of the garage, resting upon a pair of 4x6 posts, and doubling up the two other 2x6 joists, then slapping 160 sq ft of 3/4 plywood on top.

This will give me a stout main beam for the chain fall/engine hoist duty, and plenty of storage above, where the goal is to store the '29 roadster pick-up body and maybe the '32 frame.
If I get all the materials in by this Friday, we're supposed to have a beam-raising party on Saturday to put the whole shebang together. If successful, photos to follow...
-30-
Monday, December 28, 2009
Incommunicado

I'm unlikely to post anything for the next month. January 17th is the date; just three weeks away!
Only thing happening until then is cleaning out my house and preparing to move, including (groan!) all the stuff in the garage. Might get tires for Twice Lucky to make 'er a roller for the move, and that's probably about it.
-30-
Friday, December 4, 2009
Maintenance Post
Hey all! Just checking in to let you know I'm not trapped under the car in the garage. Au contraire, I've been playing the role of general contractor on the new house my fiance and I bought. Looking forward to the brick detached two-car garage! But, in the meantime, I get to check up on painters and electricians, plumbers and roofers...it's a good problem to have, though. We're blessed to be able to get this house and and have work done to it, so I'm not complaining. I should be able to get back out in the garage soon; I've got good friends who've offered to help.
So, here are a few photos of where the hot rod is now. Just added the distributor and wire conduits recently. Need to order spark plugs (or round up some NOS ones from my uncle; I'm sure he has them) and wires, and the tires, to make 'er a roller.
-30-
Tuesday, November 17, 2009
New Old Spring and Other Parts
No witty title this time. Just an update on the spring situation, and a showcase of some additional parts for the hot rod.
So my friend turned out to have not only a better '26-'27 Model T rear spring main leaf, but nearly the whole spring (less the top leaf), so I bought it outright rather than trading him my seen-better-days reversed eye (and broken and welded in the middle) heated and bent main leaf.
This one has something I hadn't seen on mine, perhaps because the eyes were reversed: grease cups for the shackle bolts.
I will have to disassemble the whole thing and wire brush at least the main leaf, if not the whole thing, and mix and match the remaining leaves from my current spring to assemble a decent spring pack so the spring won't rest on the axle tubes like it is currently. Then I'll have to find and install another set of shackle bolts the right length to fit in the 2" wide spring.
Next, I neglected to photograph the '20-'25 oval Model T gas tank my friend sealed (with POR-15) and painted (Rustoleum semi-gloss enamel) for me. This was another timesaver job just to get it done, and I appreciate his having done it, because he was very patient to perform the various steps of etching, sealing, drying, etc. Here are the results. You can just barely see the inside, showing the baffle, in the second photo.
Finally, I decided to paint the spark plug wire tubes before mounting them, as they were only primered. Here they are wearing their John Deere Blitz Black paint jobs. The terrible flat lighting doesn't begin to show what a silky satiny black this paint is. I think it's a hard enamel, too (implement paint), so it should be tough enough for most applications on the hot rod. I think I might just use more of this in other places on the car as I really like the look of the finish, popularity or over-exposure of semi-gloss black hot rods aside.
That's it for now. I should be working on and replacing the spring this weekend, as I've got some "garage therapy" time planned; it's been a while since I've been out there. Until then,
-30-
Subscribe to:
Posts (Atom)